I Can Do All Things Through Christ Who Strengthens Me. Philippians 4:13
And whatsover ye do, do it heartily, so to the Lord, and not unto men. Colossians 3:23

Saturday, December 22, 2012

A Hero Arts Thank You

Hello Everyone,

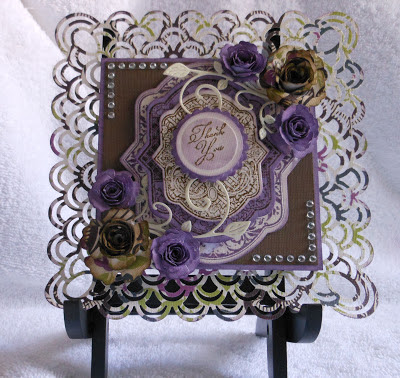
Today I have a "Thank You" card I made for a very kind family. I decided to use more bright and cheerful colors to really express my gratitude. I will be entering this card into the Hero Arts 2013 Take 'n Make - Clear Stamps Challenge at the CLASSroom.

 
I used a cream colored card base and covered it with DCWV cardstock. The sentiment and flowers were stamped using distress inks.

Well that's it for me. I'm sure this is my last post of the year, unless something else happens and I need to make another card. So....

...........HAVE A MERRY CHRISTMAS AND A HAPPY NEW YEAR...........

Hugs,
Regina

Products Used:
Stamps: Hero Arts Clear Design: Feather Grass
Paper: DCWV Citrus Stack and Citrus Cardstock Stack
Ink: Distress Ink Mowed Lawn, Tumbled Glass, and Spiced Marmalade; Sakura Gelly Roll Clear Star

Tuesday, December 18, 2012

Spellbinders Explore Beyond: Craft to Win Challenge

Hello Everyone,

Today's project is one I'm entering into the Spellbinders Explore Beyond: Craft To Win Challenge.  Here's some information about the challenge, but you can find all the details on the Spellbinders link listed above:

Simply create an original project using at least two (2) Spellbinders dies. And get creative with it! Push your own creative boundaries...do something different. We'll be looking for those crafters and artists who have really taken on the challenge to truly "Explore Beyond". Craft to Win a $5,000 Grand Prize Package from Spellbinders and our cross promotional partners! We'll also be choosing a 2nd place winner to receive a $1,000 prize package and a $500 3rd place prize package! The categories we could enter are: Card Making, Home Decor, Scrapbook Layout, Jewelry Making,Fabric Arts, and Mixed Media Art.  Now those are some really big prize packages.

I decided to stretch my creativity a bit, enter the Home Decor category and try my hand at some glass etching.   Here's my project. I made a Christmas glass etched candle holder using various Spellbinders dies as stencils.


Front View
 
I started off with a glass vase that I bought from Old Time Pottery for $6.99.   I used a permanent marker to determine a general idea of where I wanted to place the die cut. I cut out my die cut borders, Christmas trees and Reindeer out of white vinyl.


I adhered the die cut to the vase and rolled my brayer over the entire projects, taking special care to make sure all the edges were completely down.


I covered the entire vase with etching cream (starting with the die cut areas) ensuring that none of the glass was showing through. I let the project set over night. The next day I rinsed the vase and applied more etching cream. I did this process 3 times until I was satisfied with the look.


I added a bow with die cut poinsettia and foliage to the top.
 
 
The border came turned out really well. You can see all the details.
 

Side view of the vase. The reindeer also shows up really well against the etched background.
 

Here's a view fo the back.


I'm sorry I'm not a better photographer, it really look much better in person.

Well that's it for me. Have a Blessed Day and blog with you later.

Hugs,
Regina

Products Used:
Dies: Spellbinders Layered Poinsettia, 2012 Holiday Tree, Frosty Forms, and Parisian Accents.
Embellishments: Stickles Diamond: Dooblebug Design Sugar Coating Lily White Glitter
Tools: Cricut Vinyl and Transfer Tap; Armour Etch Glass Etching Cream; Glue Brushes; Brayer
 

Wednesday, December 12, 2012

12 Tags of Christmas with a Feminine Twist Challenge

Hello Everyone

Today I decided to join in on the 12 Tags of Christmas with a Feminine Twist Challenge over at Ellen Hudson's The ClassRoom. For this challenge have to create a tag inspired by one of the Feminine Twist tags, OR create several making certain we note which tag we were inspired by AND they must be different tags! I created a tage inspired by Jennifer McGuire's tag. I really liked her clear tag idea.  Well, here's mine.


I decided to create a white on white tag. I didn't have any bird stamps or dies, so I decided to use a poinsettia instead (I can come up with any reason to use these dies).  The tag still has a feminine look, which works for me.

Well that's it for now. I'll blog with you all later.

Have a Blessed Day,
Regina

Products Used:
Die: Tim Holtz Alterations Tag & Tie By; Spellbinders Layered Poinsettias and Foliage
Stamp: Heartfelt Creations HCPC 3323 Large Elegant Word Background
Ink: StazOn Metallic Silver
 

Wednesday, December 5, 2012

JustRite Friday Challenge #087

Hello Fellow Crafters,

Well I'm here with JustRite Friday Challenge #087 "Picture This". For this challenge, we have to use a photo in our projects, and JustRite Stamps, of course. So I decided to catch up on some of my, much neglected, scrapbooking. This is my son's kindergarten year, and he has already taken quite a few school pictures. So I started my scrapbooking with his Christmas photo.

Of course I couldn't help myself, so I used my dies to make some more poinsettias. This has turned out to be one of my favorite dies. The poinsettias are just too easy to make, and they always turn out great.  I stamped the ornament onto crafting foam and cut them out using the coordinating dies.
 
 
The photo mount, scalloped circle and foliage were created with dies. 
 
 
I distress, tore and inked to edges, and placed a small ornament behind the opening.


I stamped the sentiment onto a die cut and placed it behind the photo mat.

 
I cut a die cut in half and placed it in the top and bottom corner behind the top background paper just to add another dimension to the layout.

Well that's it for me. I have a few more projects to work on before Christmas. Have a Blessed day, and will blog with you later.

Hugs,
Regina

Products Used:
Stamps: JustRite Merry and Bright, and Christmas Nested Sentiments
Dies: Spellbinders Decorative Labels Eight, Grand Big Scalloped Circles, Layered Poinsettia, 2010 Heirloom Ornament and Foliage
Paper: DCWV The Evergreen Stack and Christmas and Winter Cardstock Stack
Ink: StazOn Jet Black; Memento Tuxedo Black; Distress Ink Faded Jeans and Barn Door
Embellishment: Recollection Swirls Black, and Pearls; Crystal Stickers Glitter Domes, Foamfastic White
 

Monday, November 26, 2012

JustRite Friday Challenge #086

Hello,

Today's card is another for the JustRite Challenge #086. For this challenge were to use jewel tone papers and accessories and use any colors (or similar) from the inspiration photo in your project.


I don't know why, but I always have a difficult time using jewel tones, and this project was no exception. I tried so many different color combinations and these are the colors I finally used.


I didn't have any jewel tone pattern papers, so I decided to make my own.  I stamped the background with a small ornament stamp with StazOn metallic ink and heat embossed with clear embossing powder.


I stamped the largest ornament 5 times, die cut with Spellbinders dies, folded them in half, and glued together to give the card some dimension.


The ribbon was made using seam binding and reinkers. I used a pre-made flower from my stash and colored it to match the ribbon using a reinker.

Well that's it for me. I have 20 Christmas cards to finish before the end of the week. Have a fabulous week and I'll blog with you later.

Hugs,
Regina


Products Used:
Stamps: JustRite Merry and Bright
Dies: Spellbinders 2010 Heirloom Ornament, Foliage
Ink: StazOn Metallic Copper; Distress Ink Pine Needles, Salty Ocean
Embellishment: Recollections Iridescent Rhinestone Stickers; Ranger Super Fine Detail Embossing Power Clear
Ribbon: Seam Binding; Distress Ink Reinker Broken China and Dusty Concord

Saturday, November 10, 2012

JustRite Friday Challenge #085

Hello everyone,

Today I have another project that I made for the JustRite Friday Challenge #085. For this challenge we're to create Holiday projects and we're required to use at least 2 die cut elements on ourHoliday projects and we MUST use JustRite Stamps.

Well I needed to get my son's teachers gifts done, so I used this challenge and  made two treat boxes. I used the directions for making Tea Boxes that I found here, and altered the boxes a bit to suit my needs.

To began this project made all my poinsettias using Spellbinders dies.

 
I die cut the shapes in to the boxes using Spellbinders dies. I stamped the label and the tee o to clear plastic  and mounted onto the back of the box. A sheet of white paper was put into the boxes to the images could be seen clearly.

To create the charms, I stamped my images and sentiment onto shrink plastic with Stazon. Once the image was dry, I punched the hole and used my heat gun the shrink the plastic. I really love the way these little charms turned out.

Just in case you were curious. Spellbinder dies with the Grand Caliber will cut shrink plastic in one pass and with no problem.


All of the poinsettias and foliage were made using Spellbinder die, but the white flowers were some I purchased. I also made the pins.

 
Here you can see the top of the boxes with the poinsettias and pins.
 
 
And, here's a view of the side of the boxes.


Well that's all for me. I still need to make two more boxes. Hopefully I'll be able to get them done before this challenge is over.  If not, I'll just post them later. Thanks for stopping by. I'll blog with you later.

Have a Blessed day
Hugs,
Regina

Products Used:
Stamps: JustRite's O Christmas Tree, Kindness, Christmas Nested Frames & Occasions
Spellbinders' Layered Poinsettia, Labels Twenty, Nested Pennets & Lacey Pennants, Foliage
Paper: DCWV The Evergreen Stack and Cristmas & Winter Cardstock Stack
Ink: Distress Ink Forest Moss, Festive Berries, Pine Needles; Stazon Metallic Gold  Black
Embellishments: Crystall Stickers' Glitter Dome; Grafix Shrink Film Clear; Shrinky Dinks White; Pro 31 Design's White Flowers
 

Saturday, October 20, 2012

JustRite Friday Challenge #084

Hello Everyone,

I'm here with another card I created for the JustRite Friday Challenge #084 - Flower Power. For this challenge we were to pull out those flowers and use at least 3 flower embellishments in our projects. The flowers could be bought or handmade. So I handmade my flowers, one of my many crafting loves.

For this card I decided to pull out my Martha Stewart punches and use them again (they've been neglected a bit lately). I punched out a 6x6 square to make a frame for the card, the center card is 4x4.

I used my favorite Spellbinders dies to create the flowers. The largest flower was made using the same paper that I used on the punched frame.

  The 3 medallions were stamped and cut out using JustRite stamps and dies.


Well that's all for me. Thanks for stopping by.  Have a fabulously blessed day and I'll blog with you later.

Hugs,
Regina

Products Used:
Stamps: JustRite - Botanical Medallians & Banners and Spring Rose Medallions
Papers: DCWV - Latte Stack and Latte Cardstock Stack
Dies: JustRite - Nested Oval Medallions; Spellbinders Classic Circles Sm & Classic Scallop Circles Sm; Cheery Lynn Designs - Mini Fanciful Flourish
Punch: Martha Stewart - Double Arches
Ink: Distress Ink - Walnut Stain and Dusty Concord
Embellishment: Recollection - Adhesive Rhinestones Squares
 

Monday, October 15, 2012

JustRite Friday Challenge #083

Hello Crafters,

Today, I made a "Thank You" card to send to someone who's generosity meant more to me than they could have even image. Instead of sending an email to say thank you, I wanted to make a card to let them just how much their gift meant. So I created this card and matching box to send.  
 
Using the requirements for the JustRite Friday's Challenge #083, to use 3 coordinating patterned papers, to create this gift set. The box was made using the directions from a Stamps TV tutorial. I like that this box opens from the top. 

Pic of the card
 
That's if for me today, I have some homework I need to do. Thanks for stopping by. Have a fabulous day, and I'll blog with you later.

Hugs,
Regina

Products Used:
Stamps: JustRite - Kindness
Paper: K & Company - SW Botanical
Dies: Spellbinders - Fancy Tags Two
Ink: Distress Ink - Dusty Concord & Milled Lavendar
Embellishments: Want 2 Scrap - Nestibling; Seam Binding
 

Sunday, July 15, 2012

JustRite Challenge #077

Hello Everyone,

Sorry, I haven't been around for awhile, but I've been in such a crafting funk. I just couldn't find the energy or desire to create anything. But, fortunately I didn't loose the desire to buy more crafting supplies. To pull myself out of this funk, I decided to join in on JustRite's "Tag You're It" Challenge. For this challenge, we have to Create a custom tag or use a tag in your project.  Well, I've always had a difficult time creating tags, I don't know why, but they never turn out the way I hoped.  You may also remember me saying this year I would be trying new techniquest, and get out of my comfort zone with my crafts.  Well I've kept my resolution and tried something with this tag. Can you guess the new technique I tried? Well here's my tag for the "Tag You're It" challenge".


Well to start off, I distressed and inked the edges of the base tag and patterned paper.


The sentiment and frame were stamped with JustRite stamps and cutout with a Spellbinders' die. I also stamped the tiny butterflies (with JustRite stamps) onto patterned paper and fussy cut them out by hand.  I dyed some trim to match the patterned paper. The flower and leaves were made using some Spellbinders' dies.

 If you guessed that the new technique I tried was the stick pin, you were right. I was inspired by Becca Feeken who sent me a set of her beautiful pins that I won on her blog.  After seeing a tutorial by Sabrina on the Our Daily Bread blog, I finally tried making some. I found that the pins were so fun and simple to make. Thank you Becca and Sabrina for being such an inspiration.


The two larger flowers and leaves were made using dies. I purchased the three smaller flower and the pearl spray.

Thank you for stopping by, and I hope you liked my tag.  Hopefully my crafting funk is completely over soon. I miss crafting and sharing my projects with all of you.

I'll blog with you later, and have a blessed day.
Hugs,
Regina

Products Used:
Stamps:  JustRite's Kindness, Botanical Medallions and Fleur De Lis
Paper: DCWV's Cafe' Mediterranean
Copic: YG11, YG03
Dies: Spellbinders' Labels Twenty and Bitty Blossoms
Flowers: Pro 31 Design's Mulberry Ivory Flowers and Round Pearl Spray
Ink: Memento Tuxedo Black; Distress Ink Forest Moss Pad  and Crush Olive Reinker
Embellishment: Trim from Hobby Lobby and Seam Binding.


Sunday, May 20, 2012

JustRite Challenge #073

Hello Everyone,

I'm finally back to card making and today I have another card for you.  This card will be entered into the JustRite Friday Challenge #073.  For this challenge we were to create a shaped card in any shape as long as it's NOT square!  So, I needed to create a card for my daughter, who is graduating from high school, so this is what I came up with.


I used Spellbinders Grand dies to create the card base and, inked the edges with Distress Stain. The I stamp the sentiment using JustRite stamps and layered on Spellbinders dies.  I printed the 2012 from a font on my computer because I couldn't find my JustRite Fonts. I can only guess that my fonts are packed away with my other crafting supplies.  I punch out the pennant using Epiphany Craft punches and glued to the background. The mortar board/cap was cut out from a template, I created, I inked the edges with Distress Stain, and mounted with foam squares.


I created the inner page using the next small sized Spellbinder Grand die. I inked the edges so they would standout against the card base. The pic of my daughter was cut out and mounted on black cardstock. I stamped the sentiments using JustRite stamps, cut out and mounted them on the same black card stock.


The back two pages will hold personal sentiments from me and her dad.  Well that's it for me, I need to get some ironing done.  Have a fabulous day, and I'll blog with you later.

Hugs,
Regina

Products Used
Stamps: JustRite's Cherish The Memories and All Occasion Nested Sentiment
Dies:  Spellbinders' Grand Labels Four, Classic Ovals Sm and Lg, Scalloped Oval Small
Paper: From my stach
Ink: Memento's Tuxedo Black; Ranger's Distress Stains Picket Fence
Embellishments: Epiphany Crafts Clear Pennants, Hobby Lobby's trim

Saturday, May 12, 2012

JustRite Friday Challenge #072

******Happy Mother's Day******

Hello Everyone,

First I would like to wish all the mother's a very HAPPY MOTHER'S DAY.  I hope you are enjoying your day, and that you are being completely pampered.  I will be working from 9am to 1pm, then I will be able to enjoy the rest of the day with my son and MIL.

Today's project is being entered into the JustRite's Friday Challenge #072.  For this challenge, we are to use JustRite stamps to create a 3D gift items or home decor items. These can be altered items or custom made projects but NOT just a card by itself. So I created an alter wooden box and card for my MIL for Mother's Day.


For this project, I purchased a plan wooden box, painted it Lilac, and trimmed it with Fleur De Lis Doily Accents. The pleated trim was original white, I sprayed it with Glimmer Mist so that it would coordinate with the paint color.


On the box top, I used the Rose Creations dies to create the flowers and mounted them on Label Twenty  die cuts. I stamped and cut out the top label, and stamped and cut out the sentiment from the Pennants dies. I used the same Glimmer Mist on the seam binding and made a bow.  I mounted the Label on a Lacey Oval die cut and added the swirls and feathers. I used the same products and techniques on the card.


Well, that's all for me. I hope you all have a wonderful Mother's Day and I'll blog with you later.

Hugs,
Regina

Products Used:
Stamps: JustRite's Fleur De Lis and Spring Words
Paper: K & Company Susan Winget Collection
Dies: Spellbinders Rose Creations, Nested Pennants, Labels Twenty, Lacey Oval sand Fleur De Lis Doily Accents
Ink: Distress Ink Dusty Concord
Embellishment: Seam Binding: Prima Say It In Crystals Clear Crystal Swirls; Spare Parts White feathers

Wednesday, April 4, 2012

Easter Treat Holders

Hello Everyone,

Today I just wanted to share with you some Easter Treat Holders I made. This has got to be the most inexpensive and quick projects I've ever done. The total cost was $5.36 (because most of the supplies I had on hand), and it took me about 30 minutes to make two treat holders.


I hope you have enjoyed my project, and hope you and yours have a Happy Easter. Have a fabulous day, and I'll blog with you later.

Hugs,
Regina

Supplies Used:
Eggs: Creatology's Egg-Sentials
Embellishments: Michaels' Celebrate It Ribbon and Wine Charms;  Prima's No.11 Essentials Flowers

Wednesday, February 29, 2012

Giveaway at PaperCrafterCorner.com

Hellow,

There's a fabulous giveaway over at PaperCraftersCorner.com. Here's the prized package that is being offered.


Go check it out

Hugs,
Regina

LinkWithin

Related Posts Plugin for WordPress, Blogger...